How to Set Up a Society6 Shop
Do you dream of selling your art online but aren’t sure where to start? Selling your artwork is a great way to make money as an artist, but it can feel daunting! The good news is, these days it’s more accessible than ever.
When I first started selling art prints I was printing and shipping them myself. This might not sound like a ton of work, but as orders started to pick up, it became really overwhelming really fast. When you think of the traditional path to selling your artwork, you usually think of selling art through a print shop model like this. Don’t get me wrong, I loved selling my art this way. It felt like a very personal way to share my art.
But at the end of the day, it wasn’t sustainable for me. I wanted to grow, and I wasn’t able to focus my energy on other parts of my business (or my mental health for that matter!) when I was spending all day packing and shipping art prints.
Enter, print on demand. ✨
What is print on demand you ask? It’s a production model where products are printed as customers order them. There are tons of amazing print on demand sites where you can upload your art onto different products to be sold this way. And the best part is that they take care of everything! Printing, packaging, shipping, returns, the works! So a while back I decided to shut down my one-woman print shop and switch all of my product sales over to print on demand with Society6!
Society6 is one of the best print on demand sites out there. They have a huge range of products and the quality is fantastic! In this blog post, I’m going to walk you through the process of setting up a Society6 shop so you can start selling your artwork today!
One of my favorite parts about print on demand is the barrier to entry is really low. It’s accessible to anyone! You can create and list as many products as you want and your total investment for opening your shop is $1. And that’s not even a click-baity gimmick. It’s actually how much it costs to start your own art shop with Society6. So let’s dive into learning how to open your shop, and there are no ongoing fees.
Step 1: Create an account
The first step to creating a Society6 shop is to create an account! Go to society6.com and click “Join/Login” at the top right of the page.

Then click, “Create Account.”

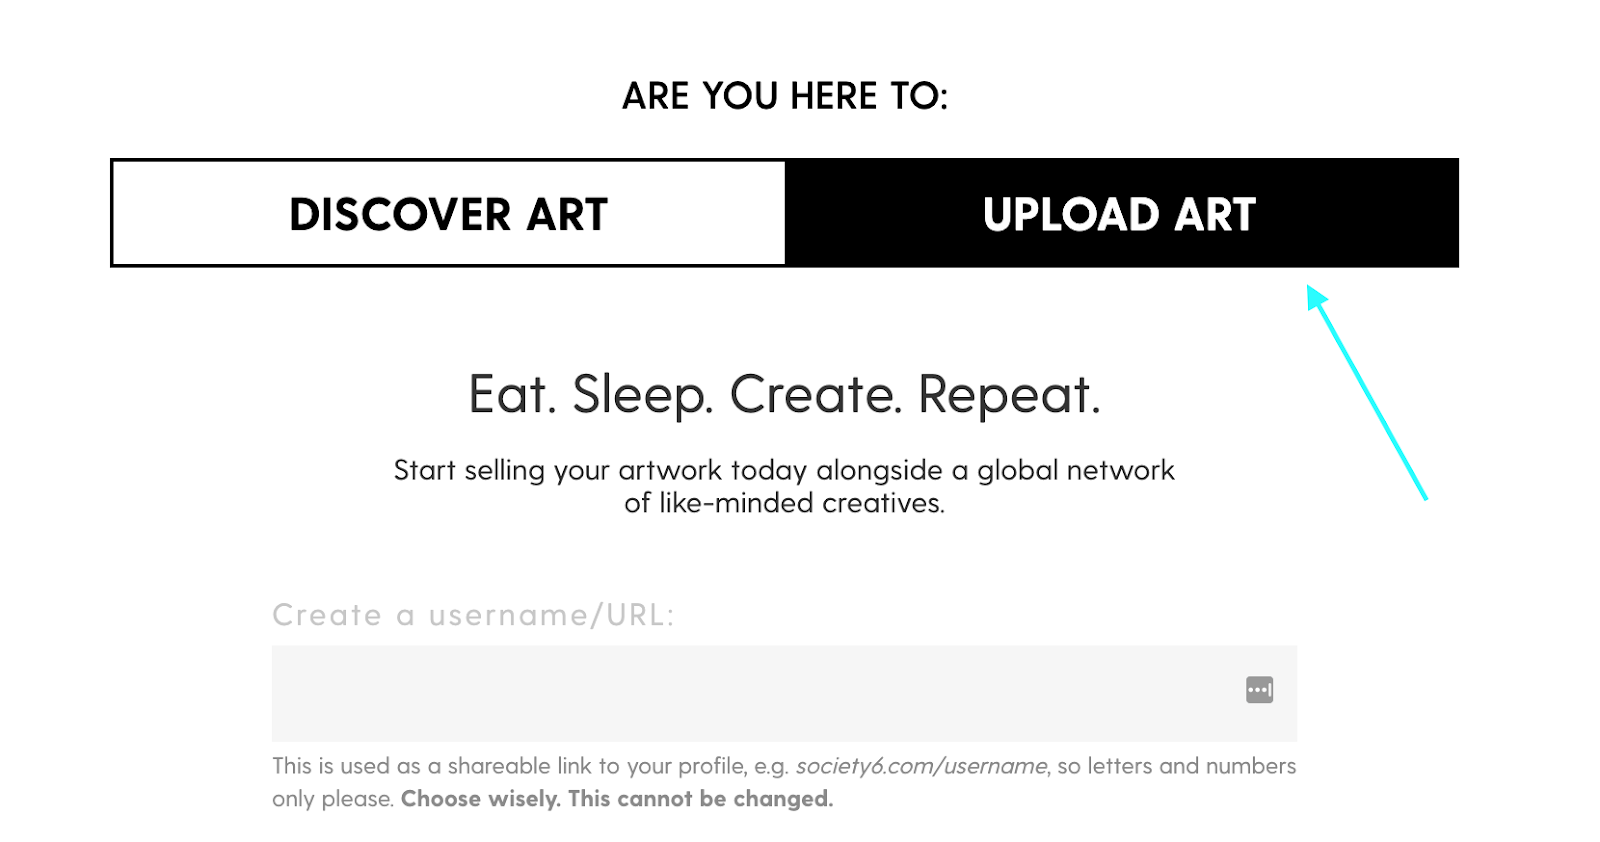
It will ask if you want to discover art or upload art. Click “Upload Art.”
Enter your information in the form, and click “Sign Up.” One thing to note is that you can’t change your username after you create your account, so make sure to choose something that can work for you for the long haul! For example, I chose “annshen” as my username even though my Instagram handle is @anndanger. Since it’s my name, I knew that annshen was broad enough to encompass my entire art brand as I grow and evolve over time!
Step 2: Get verified
Once you’ve clicked sign up, you officially have a Society6 account! There are just a couple more steps before uploading your artwork.
The next step is to get verified. Society6 uses a verification process to ensure that all of the sellers on their site are real. It also is the key to getting paid by Society6 once you make your first sale! This is the $1 cost I was talking about earlier. Verification costs $1 through your PayPal account and is a one-time process. There are no fees other than this for selling on Society6!
Scroll down and click “Get Verified” to start the process.

Click “Verify Your Identity Now” and you’ll be prompted to connect your PayPal account.
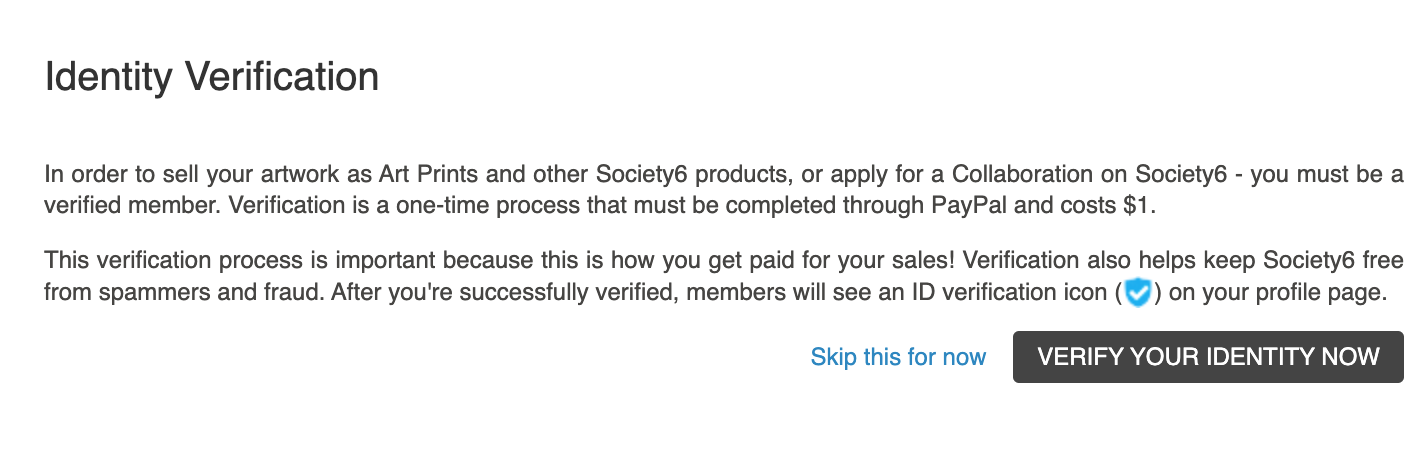
Once your $1 transaction goes through, you’ll be immediately verified and ready to get started. You should see this success message after you verify your account!

Step 3: Edit your profile
After your verification process is complete, you’ll be immediately taken to the “Artist Studio” where you can upload artwork onto your first product! However, I would recommend first editing your profile to add a profile photo, cover image, and bio. This way you’re all set up and ready to be discovered before publishing your first product.
To do this, click the little face icon on the top right of the screen. This will take you to your profile.

Click the “Edit Shop” button on your profile. A box will pop up with different options. Click “Appearance” to edit your photos and bio!

Here’s my profile as an example! I used a piece of artwork that I sell in my shop as the cover image, and the profile picture I use across all social accounts as my avatar. For your bio, I would recommend sharing a bit about you and sharing links to all of your social media as well. I know some artists who even include their email in their bio. Society6 can be a great place to get discovered by art directors, so having some more information in your bio is a great way to make sure that it’s easy to contact you!

Step 4: Upload your first product
Now it’s time to upload your first design! Click “Sell” in the top right corner of the page.

Next, click “Add New Design” to add your first piece of artwork!

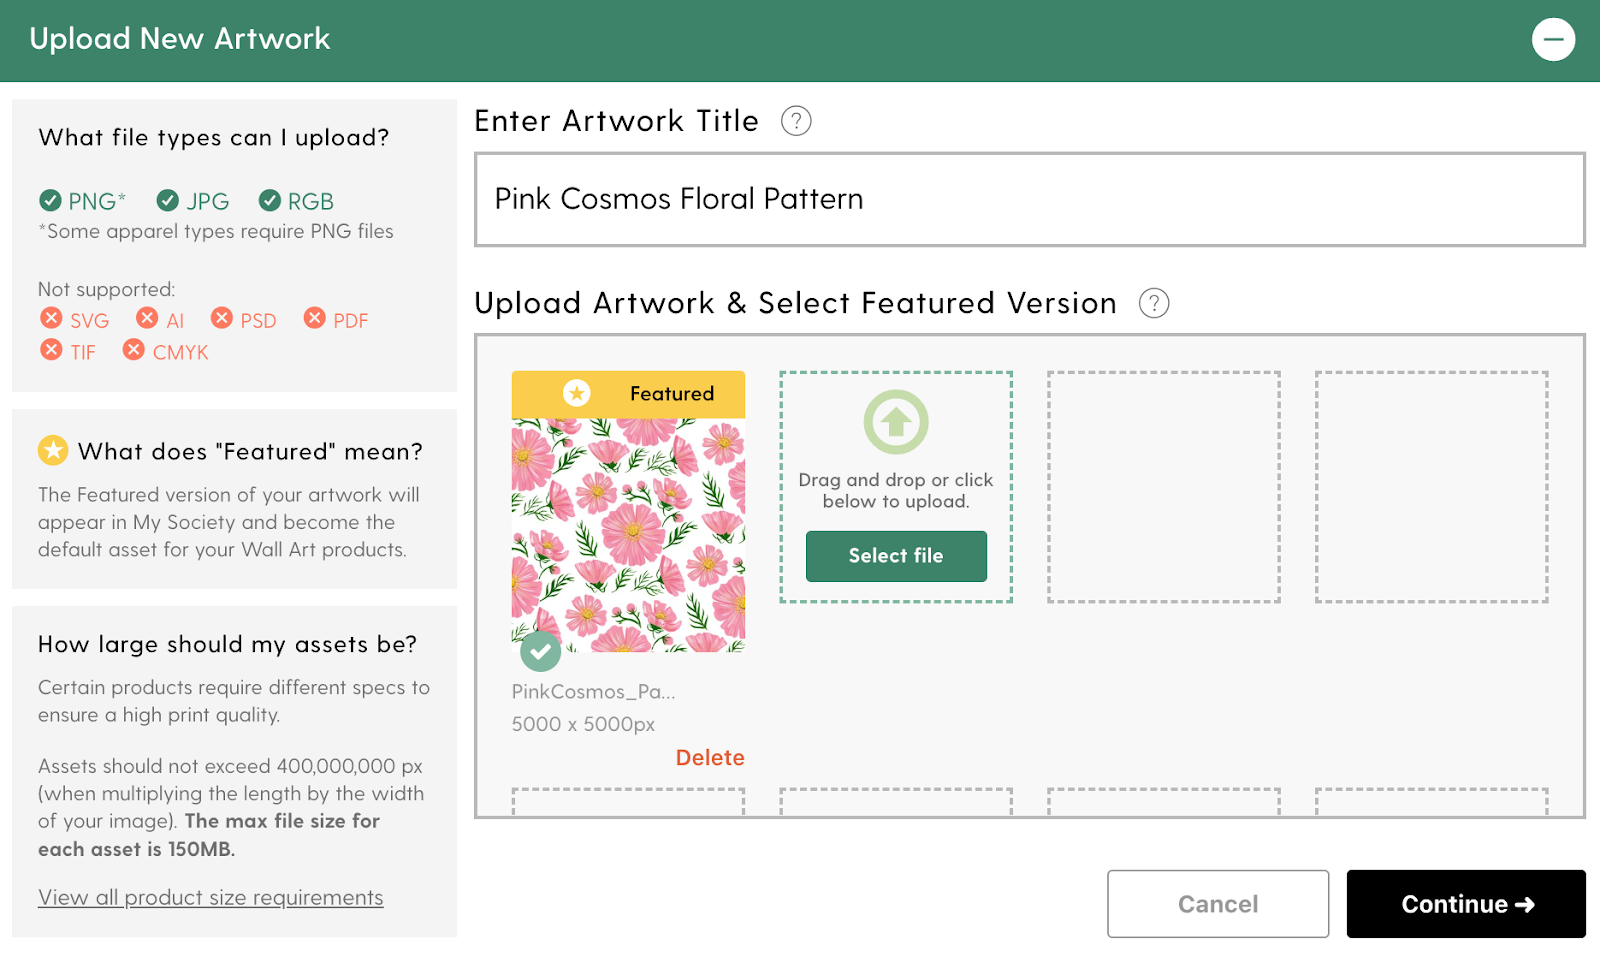
One of the amazing things about Society6 is that you can upload one design and use it across multiple products. Now you can either drag and drop your artwork into the Upload window or select a file from your computer. Choose a title for your artwork and click Continue.
Next, you’ll be asked to sign the artist agreement for Society6 stating that this is your work and you have ownership over the design.

Now it’s time to add the Artwork Details. You’ll find this on the left side of the page. Society6 uses search engine optimization (SEO) to share relevant products with people who are searching for a certain type of design. To help the search engine understand what your design is all about, you want to use keywords that your dream customer would search for in your title, tags, and description.
For example, the artwork I’m uploading is a pink floral design. So I want to try and show up when someone types “pink floral pattern” into the search bar of Society6. I’m doing this by optimizing for that keyword in the title, tags, and description of my piece. Keywords will be your best friend on Society6, so make sure you don’t skip this step!

Now it’s time for the fun part! Deciding what products to sell! In my experience, it’s best to choose as many products as you can. You want to cast a wide net to try and appeal to as many different shoppers as possible.
But the beauty of this is that it’s your shop. You can set it up however you like! Want to just sell art prints? Go for it! Does your art work better on home decor? That’s totally possible for you too.
To turn a certain product type on (aka to sell it in your shop), toggle the switch so that it says “On.”
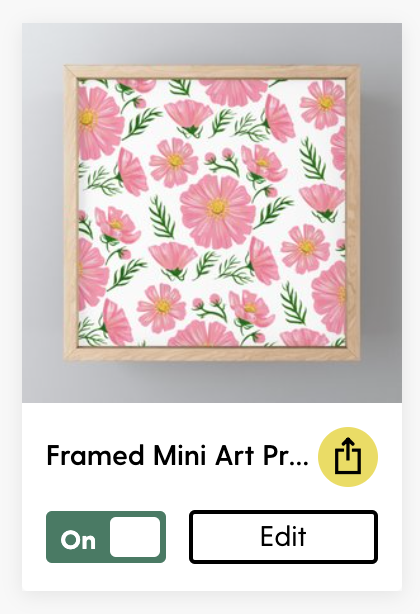
You may find that your artwork fits better on some products than others. You can change the placement of your art by clicking the “Edit” button next to the products you want to change. For example, the Apple Watch band was looking a little weird, so I jumped in and shifted the design to a spot that looked better. All you have to do is drag the design back and forth until you find a good fit! You can also change the scale of the design if it’s too large for a certain product.
You’ll notice in my example that some products were grayed out. The reason for this is that my artwork wasn’t sized correctly for those products. Since this was an example, I didn’t use as large of a file as I normally would for uploading to Society6. I always recommend using a large file size so that you have more flexibility and can fit your design on a wider range of products.

Once you’ve turned on and edited all of the products that you want to sell, you’re almost ready to publish! The last thing I wanted to touch on is pricing. The only downside to working with a print on demand site vs. running your own shop is that your profit margin will be lower. But Society6 is taking care of all of the production, shipping, and customer service for you, so keep that in mind when you’re comparing earnings from Society6 to your own shop.
When you sell your artwork through a print on demand site, your earnings are called royalties. Society6 automatically sets your royalty rate to 10% of the sale. But you can adjust that if you’d like! Click the “Pricing” tab to adjust the royalty rates on your products. You can set shopwide royalty rates or change them depending on the design.

There is a delicate balance when it comes to setting your royalty rates. If you set them higher, the products will be priced higher. This means that you could potentially lose a sale due to there being lower-priced options of similar products. But you don’t want to sell yourself short either! Pricing is a very personal thing, so take some time to research what your competitors are doing on the platform, and make an informed pricing decision from there. You can always change your prices later, so don’t let this step get you stuck!
And now it’s finally time for the big moment! It’s time to publish your artwork! Go back to the designs tab and click on the design you were working on. Then scroll down on the left side of the page and click “Publish Artwork.”

And there you have it! Your shop is open and ready for business! Be sure to share the news with your friends, family, social media followers, and email list! The best way to make your first sale is to be proactive and tell people that you’ve opened a shop!
I hope that this tutorial helped you and showed you how simple it can be to get started with selling your art online. If you start a Society6 shop, tell me in the comments so I can cheer you on!