How to Digitize Paintings in Photoshop
In this tutorial, you’ll learn how to turn your hand-drawn artwork into a digital file and remove a background in Photoshop. This is a key skill to learn if you want to sell your art online, make a repeat pattern from painted elements, or make prints of your artwork! I sell my paintings as prints in my shop and on products for clients. I also create paintings for my books. In order to replicate my artwork in these ways, the first step is to make it a digital file!
Once you get the hang of it, digitizing artwork can be a quick and intuitive part of your art-making process. Here’s how to do it!
Supplies you’ll need:
Artwork - Make sure you have a piece on hand that you want to digitize. That’s the most important thing!
Scanner - I scan all of my artwork with an Epson V600 scanner. Scanning gives your artwork a more professional look and allows you to create a high-quality image that can be scaled up on large products and prints. If you don’t have a scanner on hand, you can take a picture of your artwork - especially if you’re just practicing and don’t plan to use this commercially. Just make sure that your painting is well lit with natural light and that you take the photo from a direct angle.
Photoshop - In order to clean up the digital file and remove the paper background you’ll need to use Photoshop. You can download a free trial here.
Step 1: Scan!
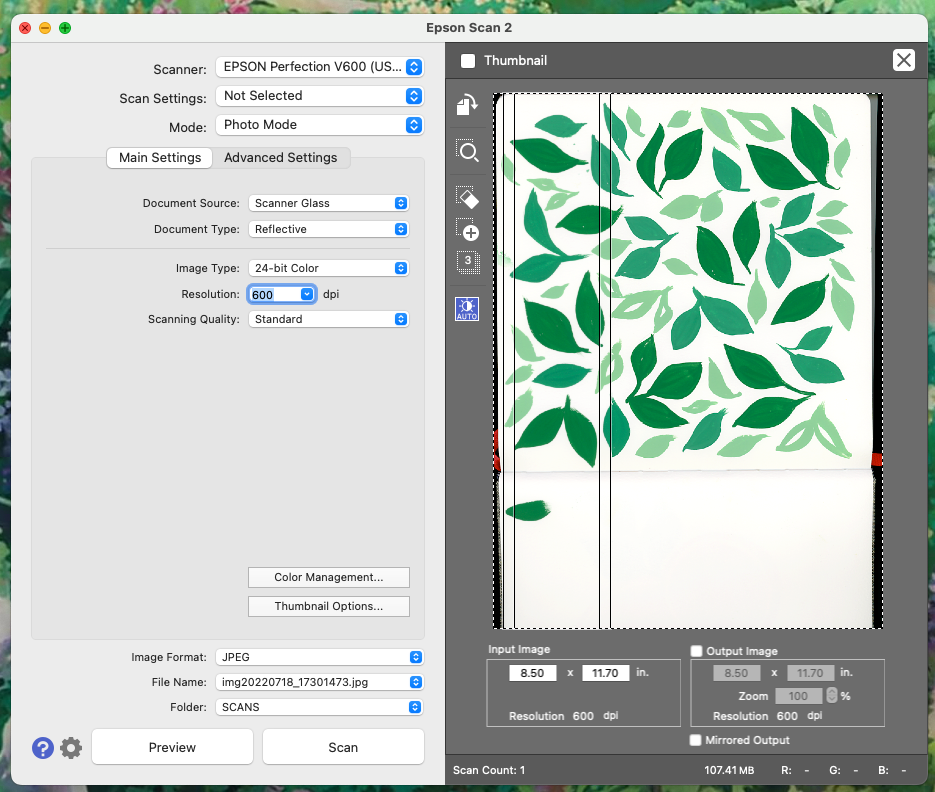
The first step is to scan your artwork. I scan mine at 600 DPI so that it can be scaled up to a higher resolution if I’m going to use it on products.
Quick note if you’re unfamiliar with DPI: DPI stands for dots per inch, and it indicates how high-resolution your digital image will be.
300 DPI is the standard resolution for printing. Anything scanned at 300 DPI can be replicated at the same size it was scanned in at. When I scan my artwork at 600 DPI that means I can scale my artwork up to twice its original size without losing resolution.
Here is a snapshot of what my scanner settings look like when I scan in my artwork. Yours might look a little different than this, but the key thing to be aware of is your DPI settings.
Once your image has been scanned it’s time to save it. I have developed a standard naming convention for my artwork so that I can keep all of my files organized. I put the date first YYMMDD (year, month, date) and I put the name of the piece after that. I have a lot of art files so this helps me stay organized and allows me to easily find the artwork that I’m looking for.

Step 2: Open and make adjustments in Photoshop
Now it’s time to move into Photoshop to make a few edits to your image. Start by opening your scanned image in Photoshop.
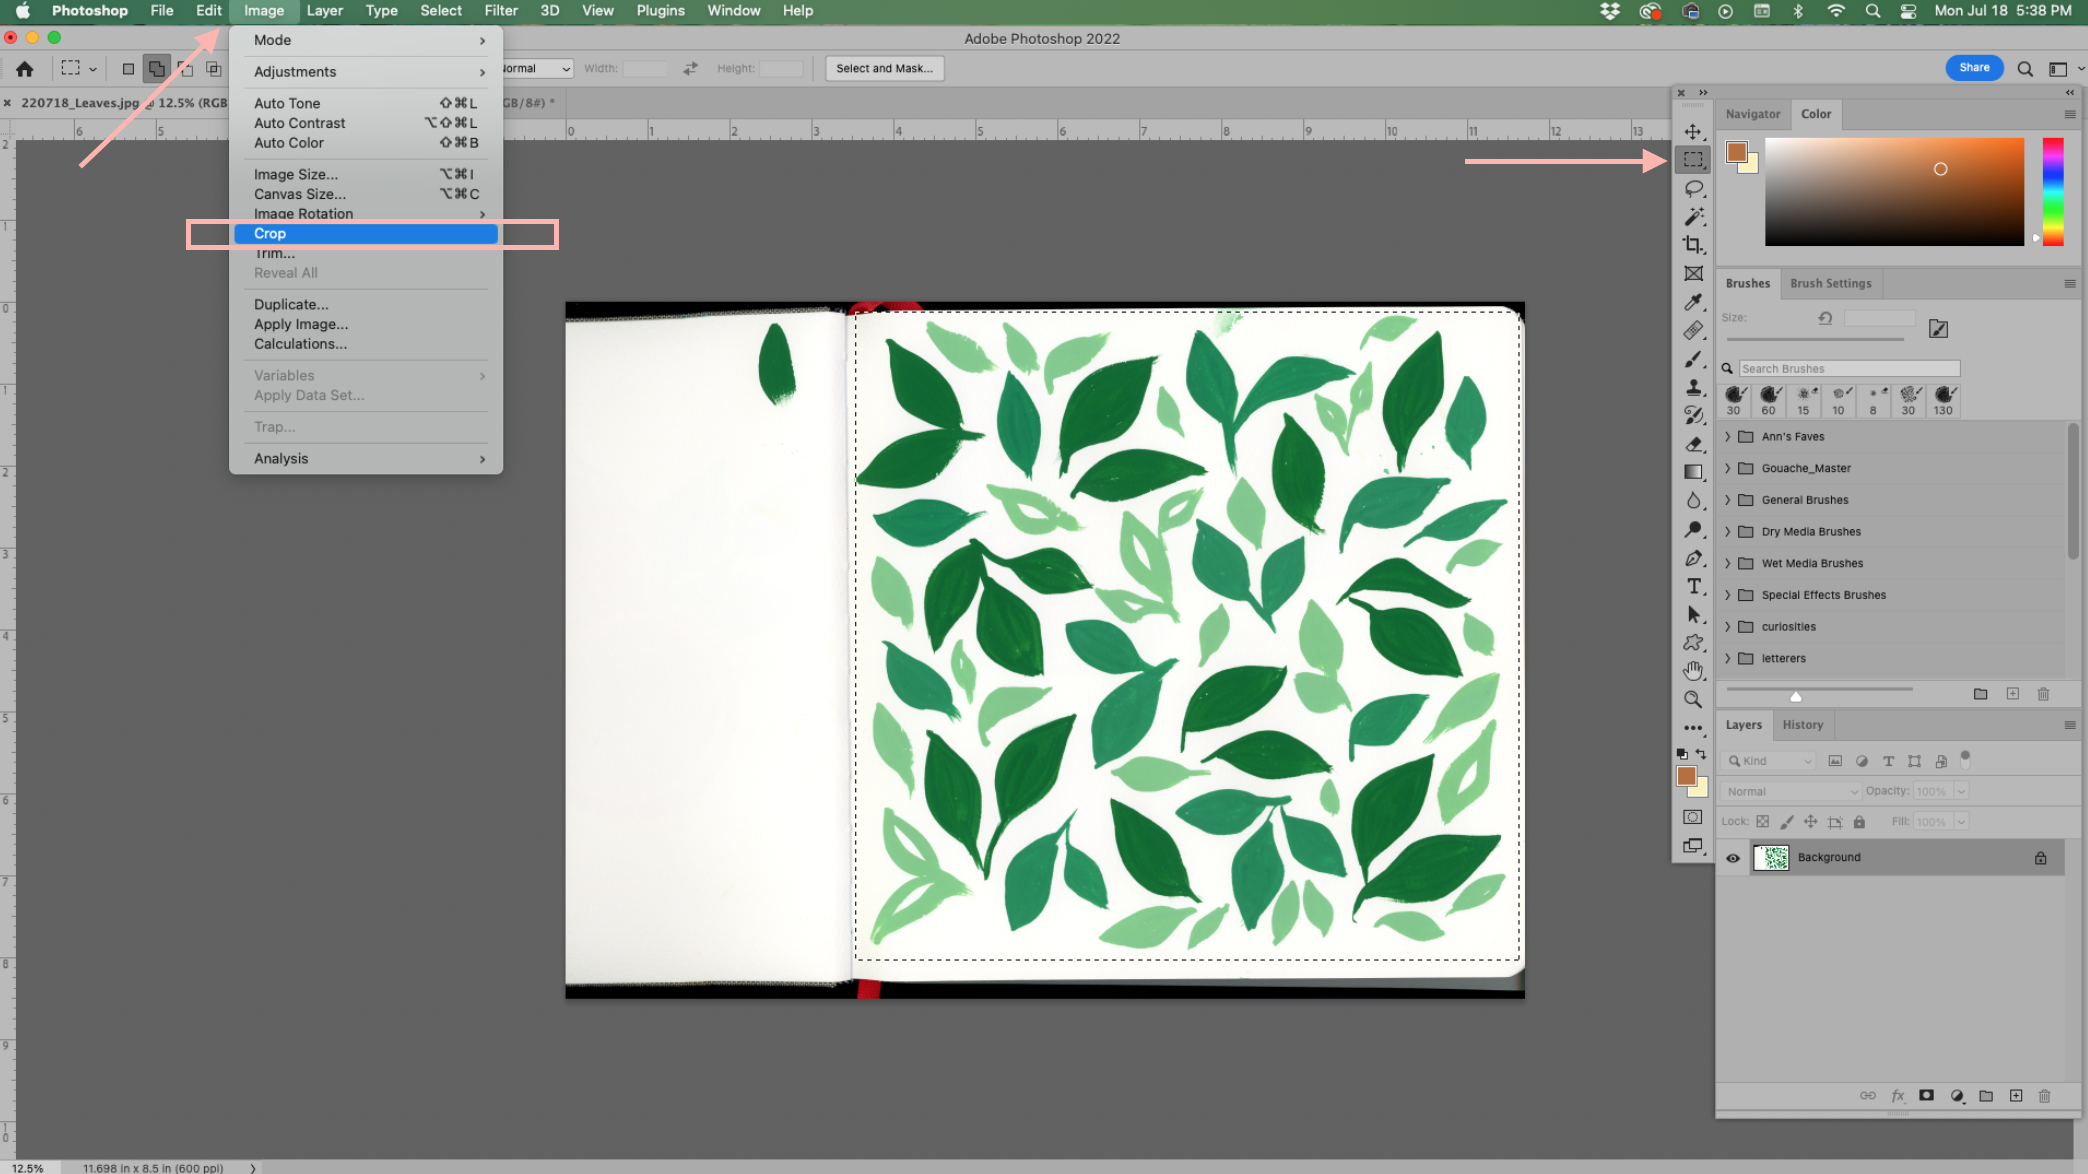
Then crop the image to make sure all you see is the painting and the white paper background. You can crop by using the Marquee tool (keyboard shortcut: m) and drawing a box around the parts of the image that you want to keep. Then click Image → Crop to remove the excess.
Your artwork is currently set as the background layer. Double click the background layer to unlock it and move the artwork to an editable layer. Then click “OK.”

From here, I like to adjust the levels of the image so that it’s easier to remove the background. Open the levels menu by clicking Image → Adjustments → Levels or using the keyboard shortcut cmd + L.

Now, use the white dropper in the levels menu to define the white of the paper. When you scan artwork, it can leave the white paper background looking a little dull compared to how it is in real life. You want to tell Photoshop what you want to define as true white. This automatically adjusts the levels of the whole piece and makes it truer to what the original painting actually looks like.
To define the white, click the white dropper on the levels menu. Then click anywhere on the white paper background. You’ll see in my example that it went from being dull and yellow to more of a true white once I clicked it.

Step 3: Remove the background in Photoshop
Next up, you’ll want to remove the white paper background. This gives you a ton of flexibility with the illustration.
To remove the background, select the magic wand tool (keyboard shortcut: w). The magic wand tool will select all the areas of your illustration that are similar in color. Before you select the background, take a look at the “Tolerance” setting. This indicates how sensitive the tool will be. Lower tolerance means it will be more discerning about which parts of the illustration it deems similar to what you’ve clicked, and a higher tolerance means it will be less. I tend to keep mine at around 25 so that I don’t accidentally cut out any essential parts of the illustration.
Now click anywhere on your white background and you’ll see that most of it has been selected. You’ll notice that on mine, there are a few parts of the background that got missed. Hold the shift key while clicking in those areas to add them to the selection.

To remove the background you have a couple of options. You can delete it by tapping the delete key on your keyboard and then tapping cmd + d to deselect.
Or if you prefer non-destructive editing, use the key command: shift + cmd + i to get the inverse of the selection (aka selecting your illustration). Then use the keyboard shortcut: cmd + j to copy the selection onto a new layer.
Now your background has successfully been removed! In my example, there were a few spots in between the leaves that didn’t get selected when I was using the magic wand tool because they weren’t touching the other white areas.
To grab these and remove them, use your magic wand tool again but make sure that contiguous is unchecked. This means that the magic wand will select all of the similar areas even if they’re not touching.
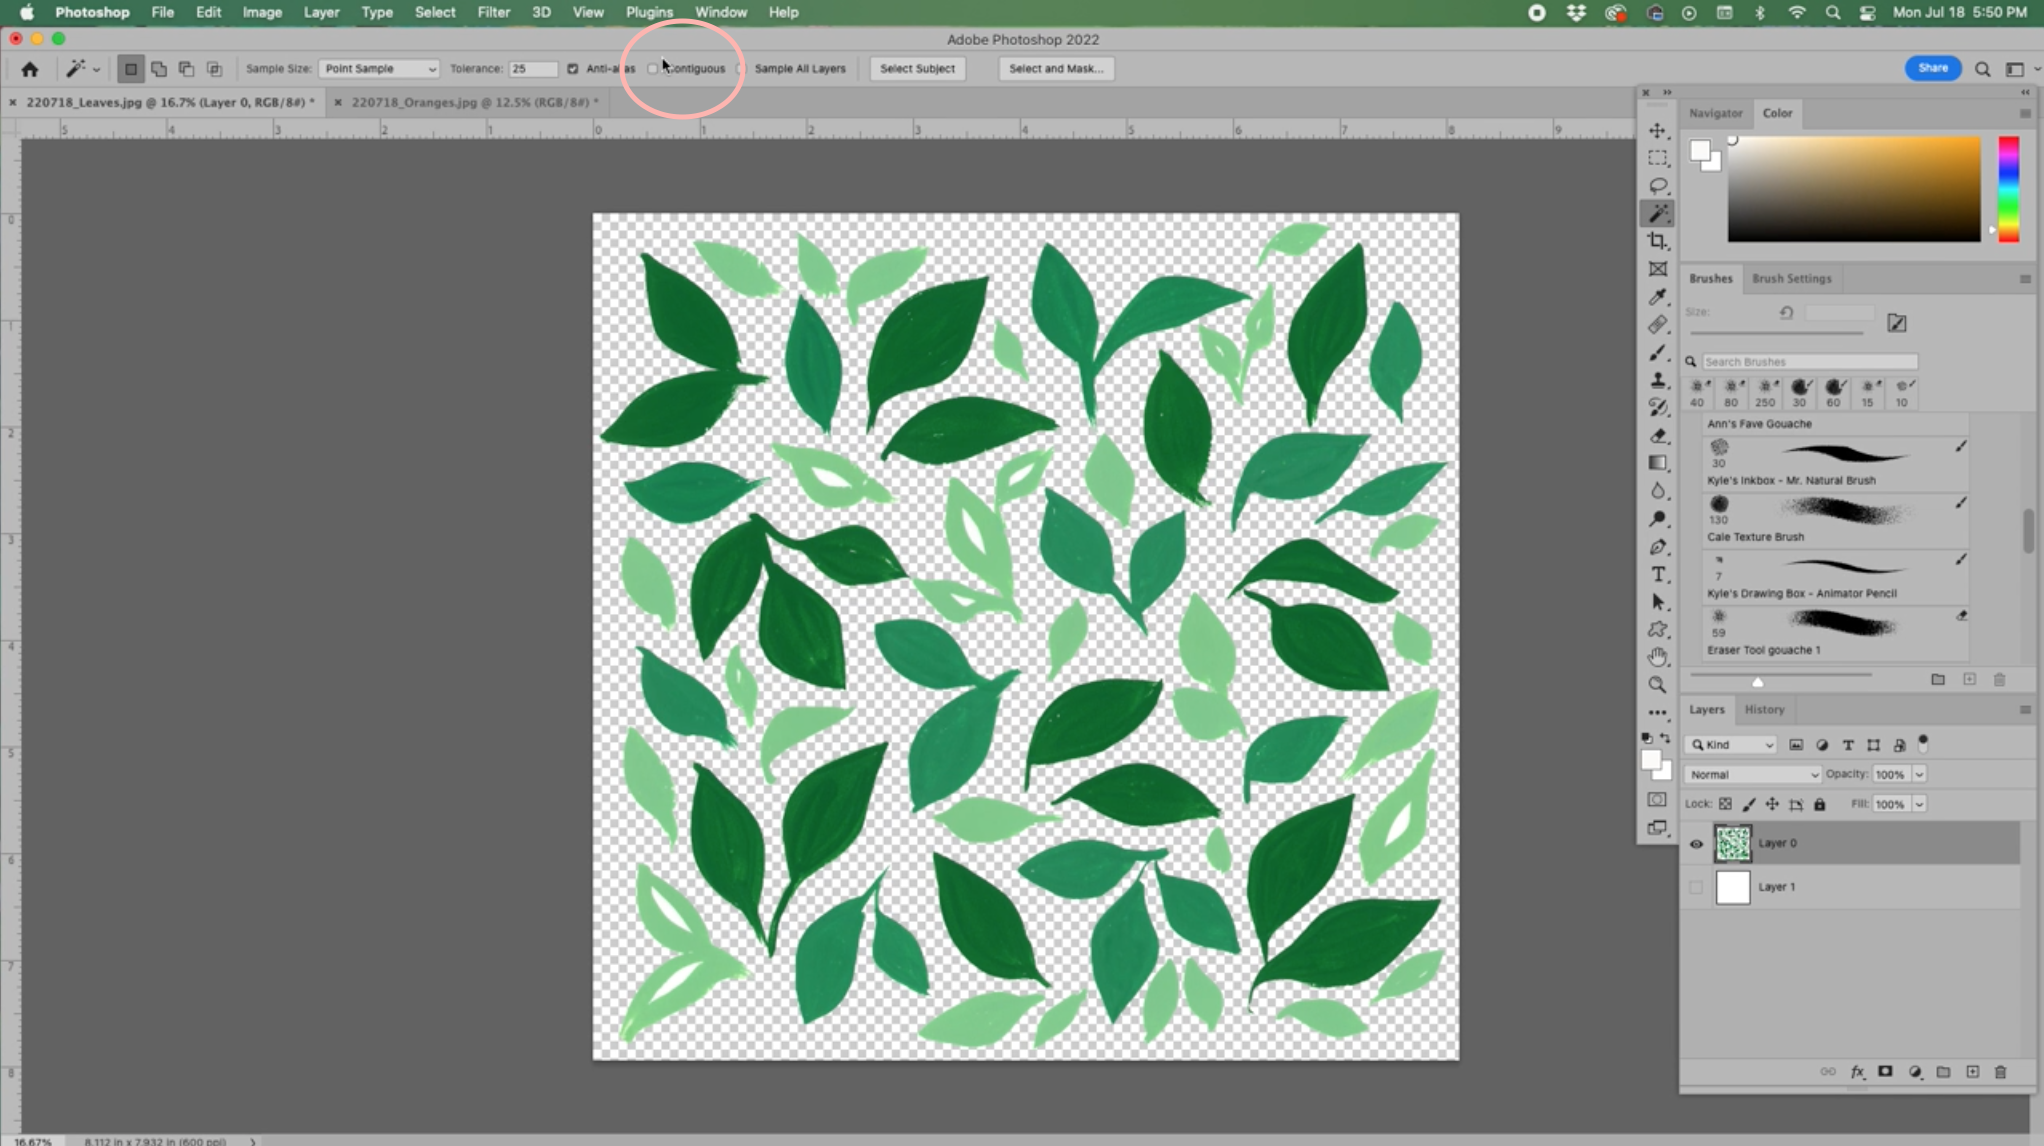
Now you have a fully digitized illustration with the background removed!
I hope this tutorial was helpful! I’d love to see your digital illustrations. Share your artwork on Instagram with the hashtag #ArtWithAnnDanger so I can see what you make!