Learn to Paint Ranunculus in Gouache
Ranunculus are one of my favorite flowers, and today I’m going to walk you through how to use gouache to paint this beautiful flower! If you’ve ever wanted to learn how to paint flowers in gouache, this tutorial will be the perfect starting place!

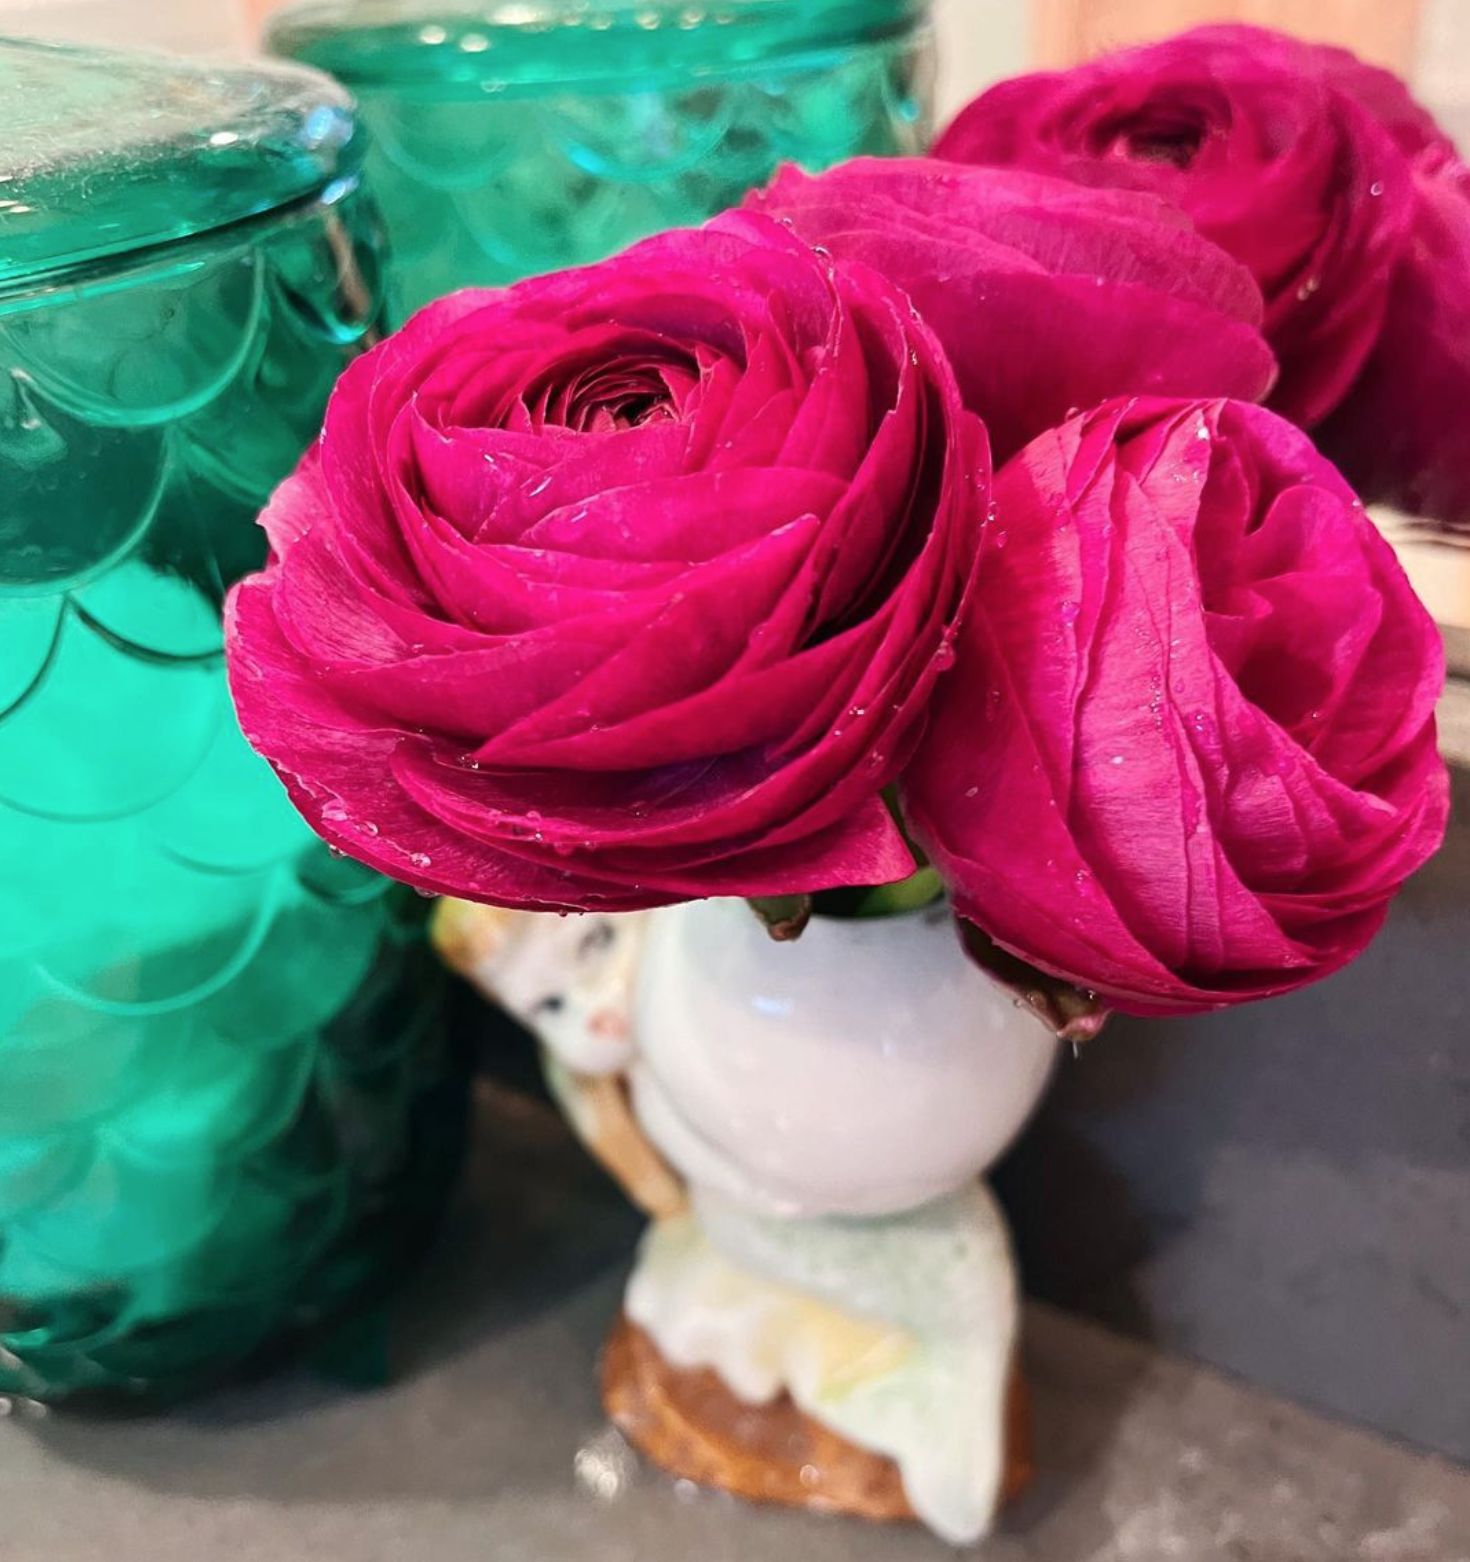
Ranunculus are characterized by their abundance of layered petals tightly curving around the flower’s center in a circle. With so many petal layers, it might feel like a daunting subject to paint, but it’s actually fun and simple! Let’s dive in!
This post contains affiliate links which means if you purchase from one of the links I earn a small commission at no cost to you!
Supplies:
For this tutorial, you’ll need:
A reference photo of a ranunculus flower
Gouache paint in the colors of your flower. My preferred gouache brand is Winsor & Newton Designer gouache and I’ll be using reds, oranges, and whites to create a coral-colored ranunculus.
Watercolor paper. I prefer a hot-press paper like this one, but any watercolor paper will do!
Paint brushes. I’ll be using a size 6 round brush.
A cup for water
Paper towels

Step 1: Reference Photo
First up, you need to get a reference photo of the flower you want to paint. Ranunculus come in all shapes, sizes, and colors, so having a reference will help you make decisions about how to paint your flower. Feel free to use a reference image from a royalty free stock photo site like unsplash.com, or use nature as your reference!
I grow ranunculus in my garden, so every Spring I get a fresh batch of floral inspiration right in my own backyard. I love painting flowers because it gives me an excuse to get out in nature and see what beautiful flowers I can find! Plus, if you take your own photos for reference you won’t have to worry about copyright issues.
Step 2: Paint the Background
Now that you have your reference photo, it’s time to paint! Since gouache is an opaque medium, we always want to paint from back to front. Start by looking at your reference photo to determine the color you want to paint your ranunculus. I’m going to be painting mine a rosy-coral color. If you want to learn more about color mixing and color theory in gouache, head to this blog post and then come back here to finish your ranunculus!

Once your color is mixed, add a drop of water to the mixture to get the paint to the consistency of heavy cream. Gouache is easier to work with when you add a little water, but you want to make sure not to add too much so you don’t lose the flat matte finish when it dries.
Ranunculus are circular, so paint your background layer in a circular shape. But since nature is imperfect, you want to make sure that your circle has a few wobbles around the edges. When in doubt, always check back to your reference photo to get the right shape!

Once you’ve painted your circle, fill it in and smooth out your paint so that there aren’t any streaks.
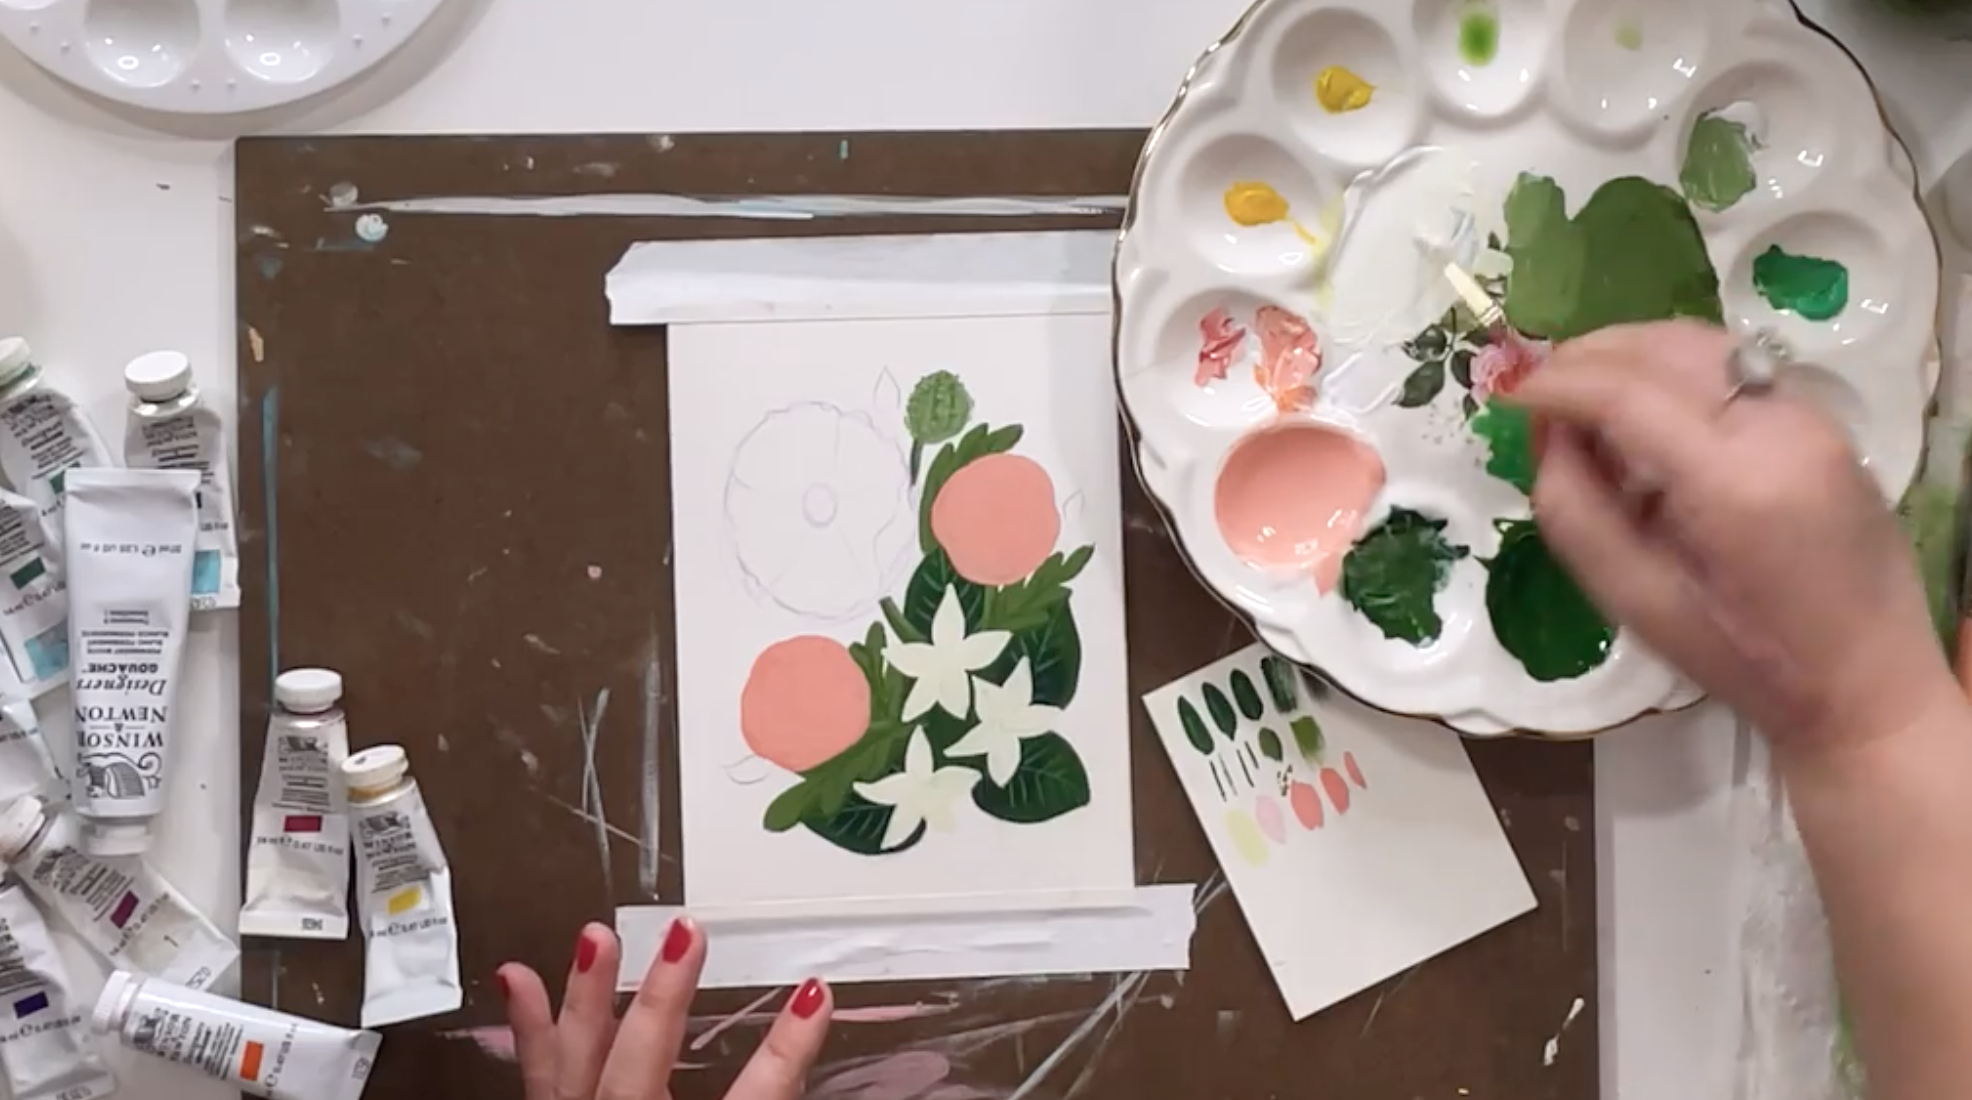
Step 3: Paint the Petals
Once your background layer is dry, it’s time to add the petals! Mix up a slightly darker version of the color that you used for the background of your flower. This will help it look cohesive, but will still make the petals stand out.
Ranunculus petals all curve around the center of the flower, so we’re going to paint in some short “C” shaped strokes following the curve of the flower to represent the petals. Start from the center of the flower with short, tight brushstrokes but make sure to leave space between them so each petal is distinct.

Step 4: Add Highlights
Let’s add some dimension to the flowers by adding some highlights. To do this, mix up some paint in a shade a little lighter than the base color you used. Now using the “C” shaped petal technique, add a few highlights throughout the flower. Since this is just a highlight, you don’t want to add a ton of these light-colored petals, but including a few throughout your flower will really help it pop.

Step 5: Sparkle Pass
We’re almost done with our ranunculus! Now it’s time for the final step. This is optional, but it’s something I like to add at the end of every one of my paintings for a little pizazz. I call it…The Sparkle Pass! ✨ Add a few white marks on your flowers to give them a little extra sparkle. It’s a small touch, but it can really help bring everything together!

And there you have it! Beautiful gouache ranunculus!
Want to dive even deeper into gouache floral painting? Join me in my class, Painting Flowers in Gouache to learn how to paint a floral bouquet step-by-step.
