Gouache Gradients
Creating Blended Backgrounds With Gouache
Wondering how to get smooth blends in gouache? In this tutorial, you’ll learn how to create seamless blended gradients using gouache paint. This satisfying gouache technique is easy for beginners to learn and results in beautiful gouache paintings. Gradient blends make fabulous backgrounds and they’re also just plain fun to paint!
This post contains affiliate links which means if you purchase something I may make a small commission at no cost to you.
Blending Overview
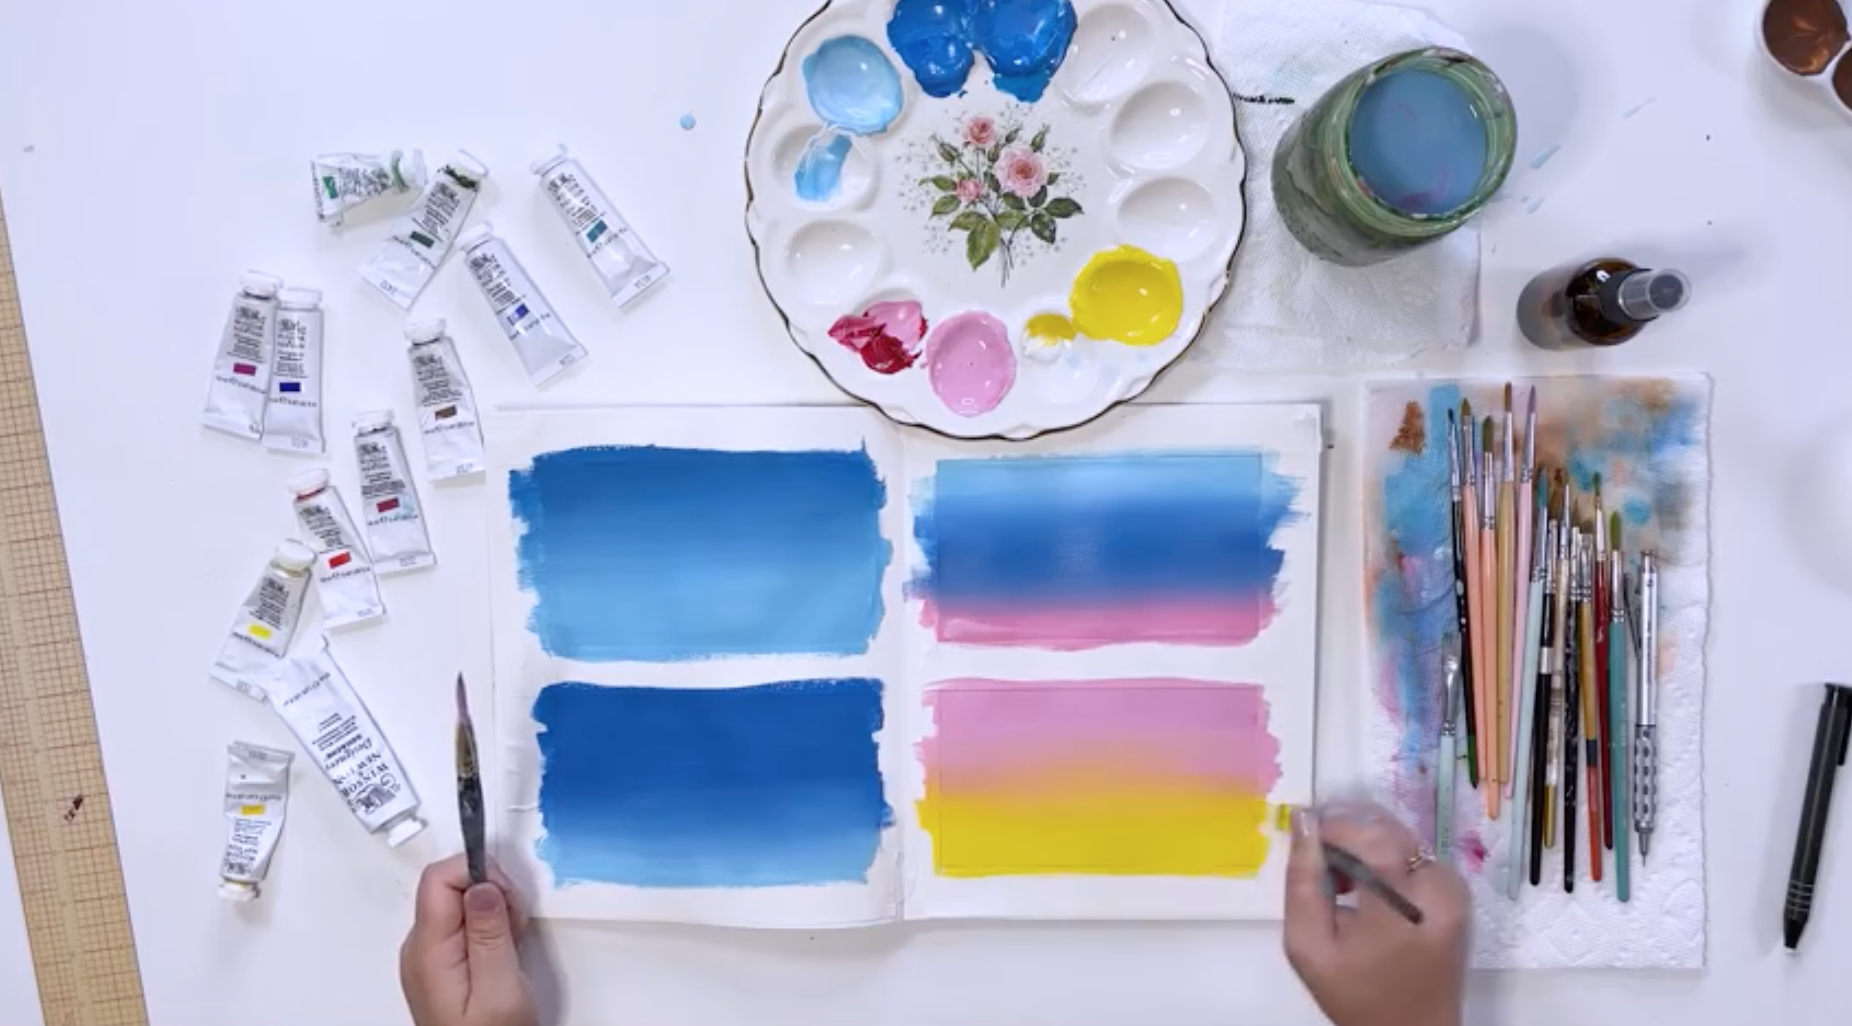
To get a seamless gradient blend between two colors, you’ll paint the colors at either end of your art board and slowly bring them together to meet in the middle. This will create a gradient effect where each color starts in its pure form and slowly transitions into the second color. In the following steps, I’ll walk you through the exact process for creating this type of blend.
Use Two Brushes
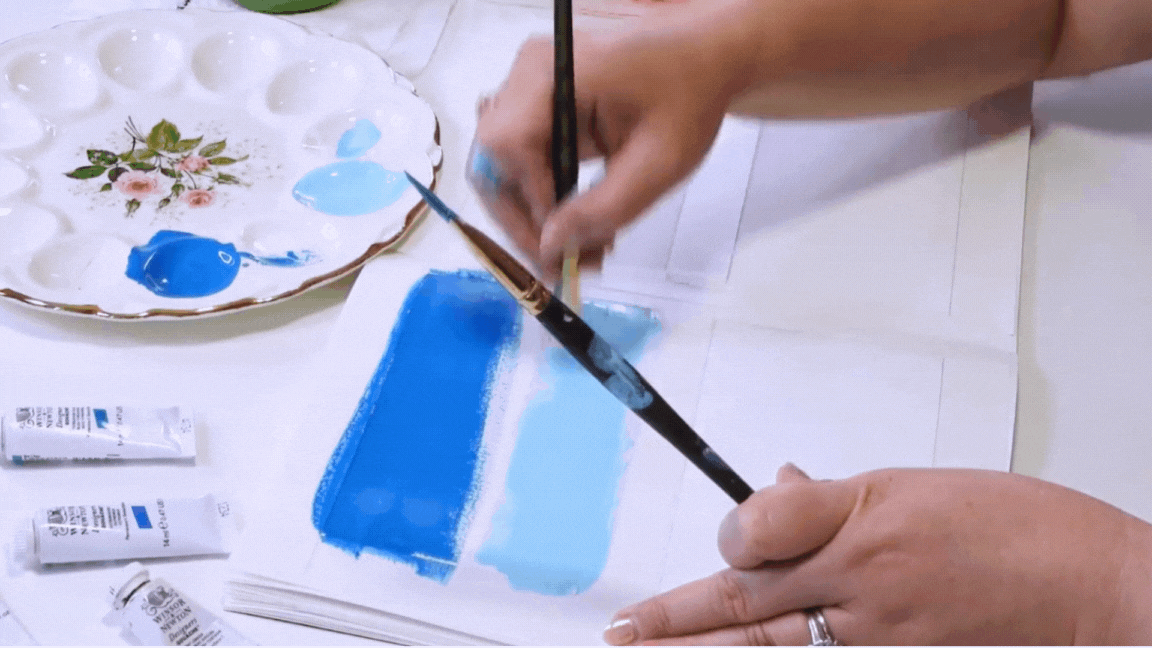
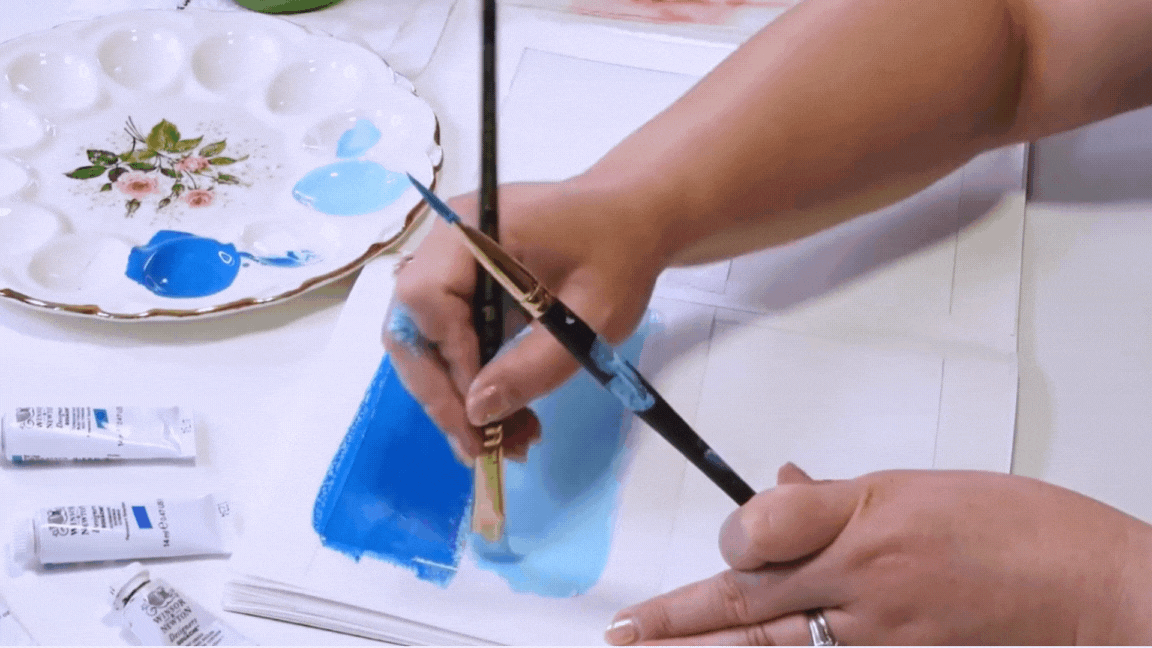
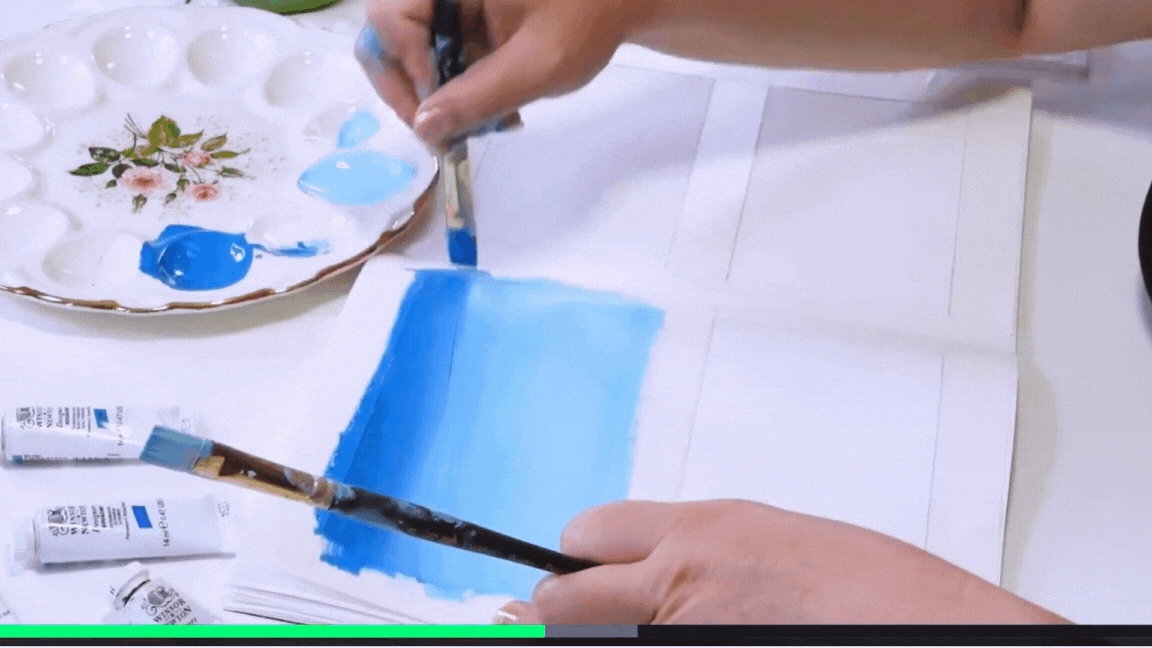
One of my top tips for blending in gouache is to make sure that you have a dedicated brush for each color in the gradient. Without separate brushes, it’s hard to maintain the two (or more!) individual colors. You don’t want your paint to mix on the page and turn into one flat muddy color, so make sure to load up two brushes with the colors you plan to blend.
I prefer to use flat or filbert brushes to get a seamless wash without streaks. Any brushes that you have on hand will work, but flat brushes create the most even blend.

Wet on Wet Technique
The key to smooth transitions in gouache is to use wet on wet technique. This is when you paint wet paint on top of wet paint and let them mix on the page. Since gouache is an opaque medium, you won’t be able to get a blended effect when painting wet paint on top of dry paint. The wet paint will simply cover up the dried area instead of mixing with it.
Keep this in mind as you’re working on your blend and work quickly so you can create your transition while both colors are still wet.
Blend!
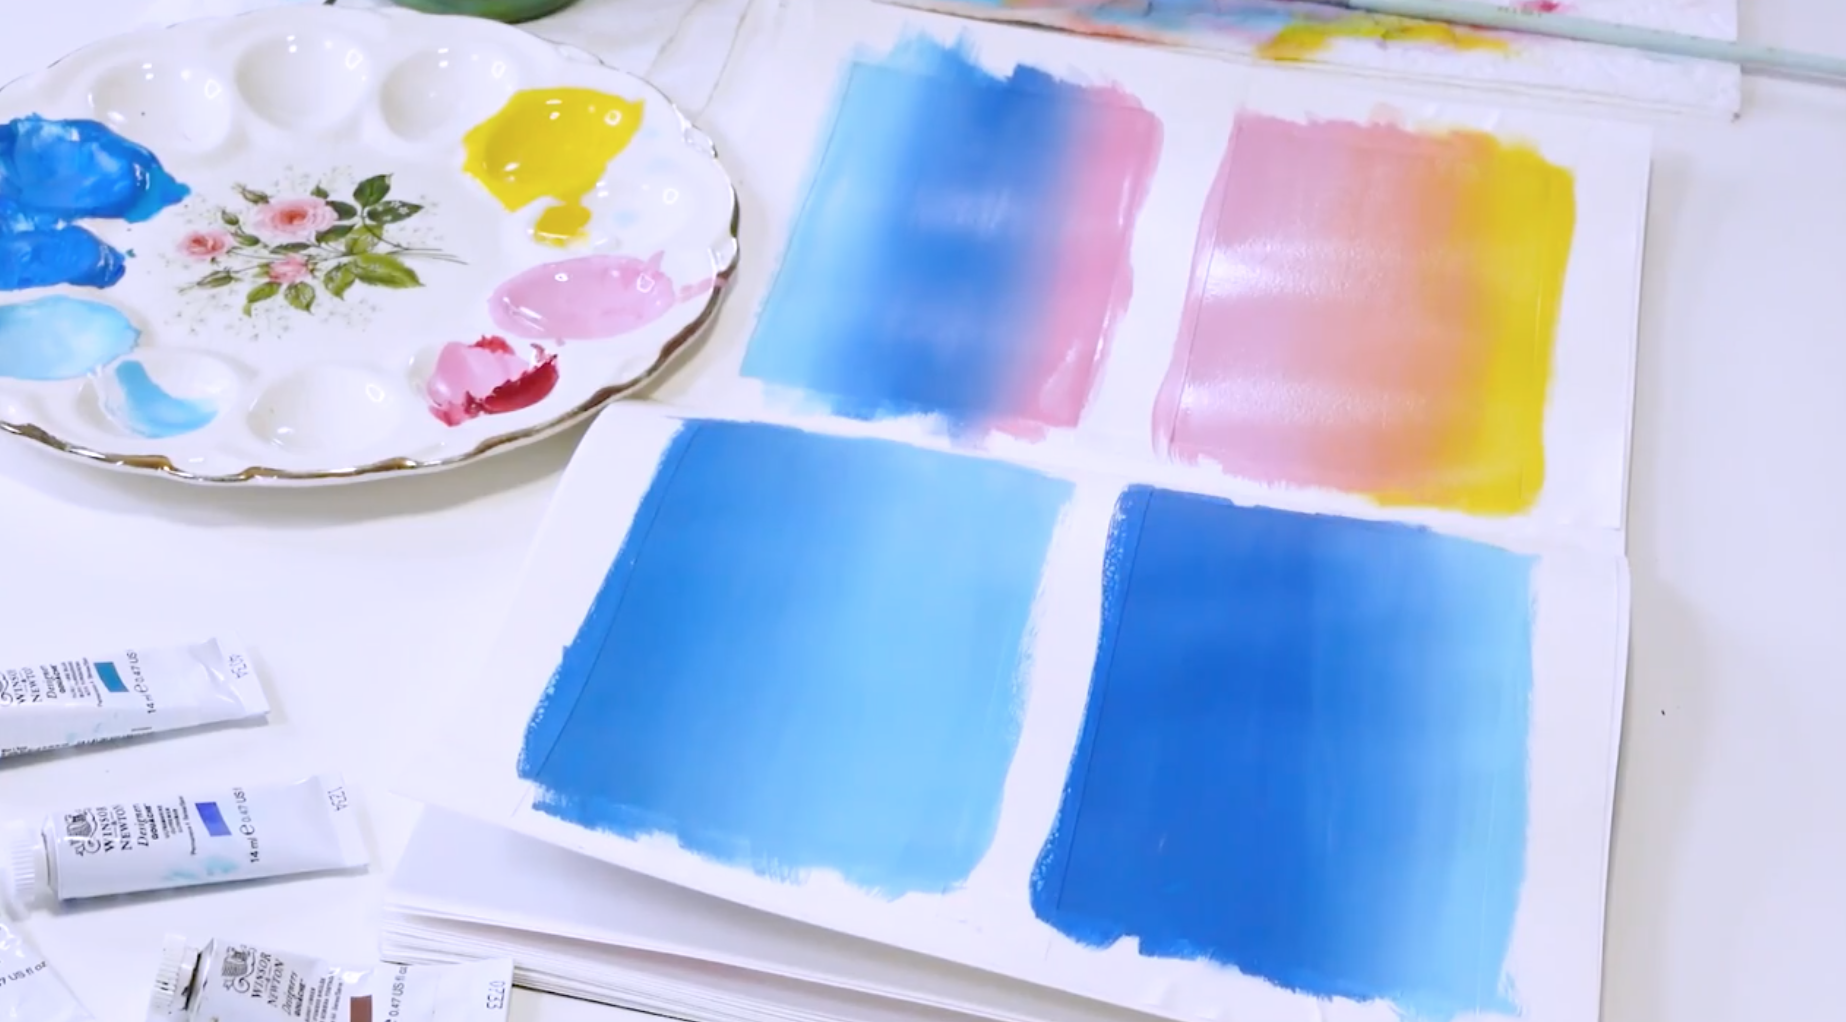
Now it’s time to blend! You can create gradients with as many colors as you’d like, but for this
example we’ll just use two.
Make sure you have your two brushes loaded with the colors you want to blend and start by painting the first color on one side of your page. Then keep painting back and forth until it’s about halfway down the page.
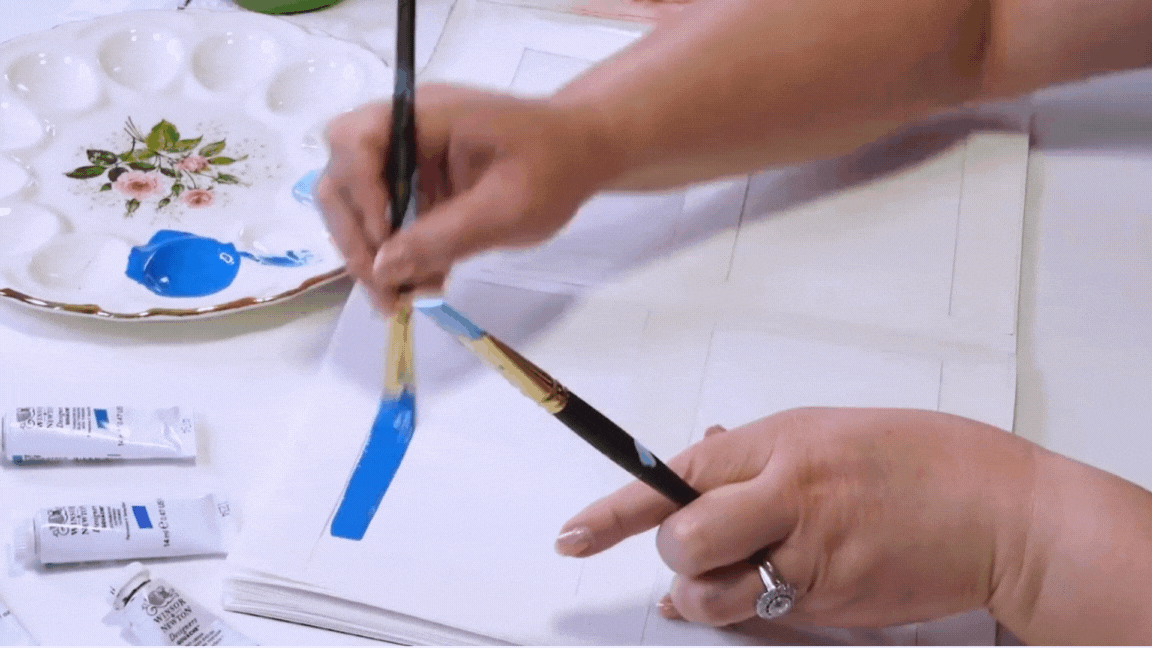
Next, start painting your second color at the opposite end of the page and bring it up to meet the first color. From here you want to make sure the colors meet as you paint back and forth. Since both colors are wet, they will mix together on your page and blend to create a brand-new color!
I usually go up and down the page a few times with each color to make sure I’m getting an even blend. Load the color on your brush, start at the top of the page, and slowly pull it down into the other color painting back and forth across the page. Just make sure not to blend it all the way to the opposite side of the page. You want to make sure the edges remain the solid version of each color.
Now you can continue to practice this with different colors and you can even try adding a third color into the mix! You will finish with a set of beautiful gradients that you can use as backgrounds for your paintings.
Want to learn how to turn these gradients into beautiful skyscapes? Join me in my class Gouache for Beginners where I teach five foundational gouache painting techniques including dry brushing to create whimsical clouds!
